Wooden Baby Milestone Set: The Handmade Gift Every New Parent Wants
There's a reason baby milestone photos have exploded across Instagram, Pinterest, and every family photo album in the last decade. They capture something irreplaceable — the blink-and-you-miss-it speed of a baby's first year. Month one to month twelve, gone before you know it. And when you photograph those moments with a beautifully crafted wooden prop, you turn a memory into something that lasts forever. This set is the ultimate tool for creating consistent and beautiful monthly photos of your baby's first year, turning simple snapshots into a professional-looking visual diary.
Plastic milestone cards get thrown away. Printed cards fade. But a 3D laser-cut wooden milestone set? That becomes a keepsake. A decoration. Something parents genuinely treasure — and something that makes this the ultimate DIY baby shower gift for any maker who wants to give something truly personal.
In this guide, I'm going to walk you through everything: the right design file, the right material, laser settings for both diode and CO2 machines, how to assemble the 3D layers, and how to finish it safely for a baby's environment. Let's get into it.
The Design: Start With a Tested SVG File
This is where most beginners go wrong. They download a free file from some random forum, load it into LightBurn or their laser software, and discover the hard way that the vectors are broken, the kerf compensation is off, and the layers don't line up when assembled. That's a ruined sheet of 3mm plywood and an hour of your time gone.
For a 3D wood project like a milestone set, the file quality is everything. You need clean, closed paths. You need each layer to be clearly separated. You need a file designed specifically for laser cutting — not adapted from a Cricut SVG or a vinyl cutter template.
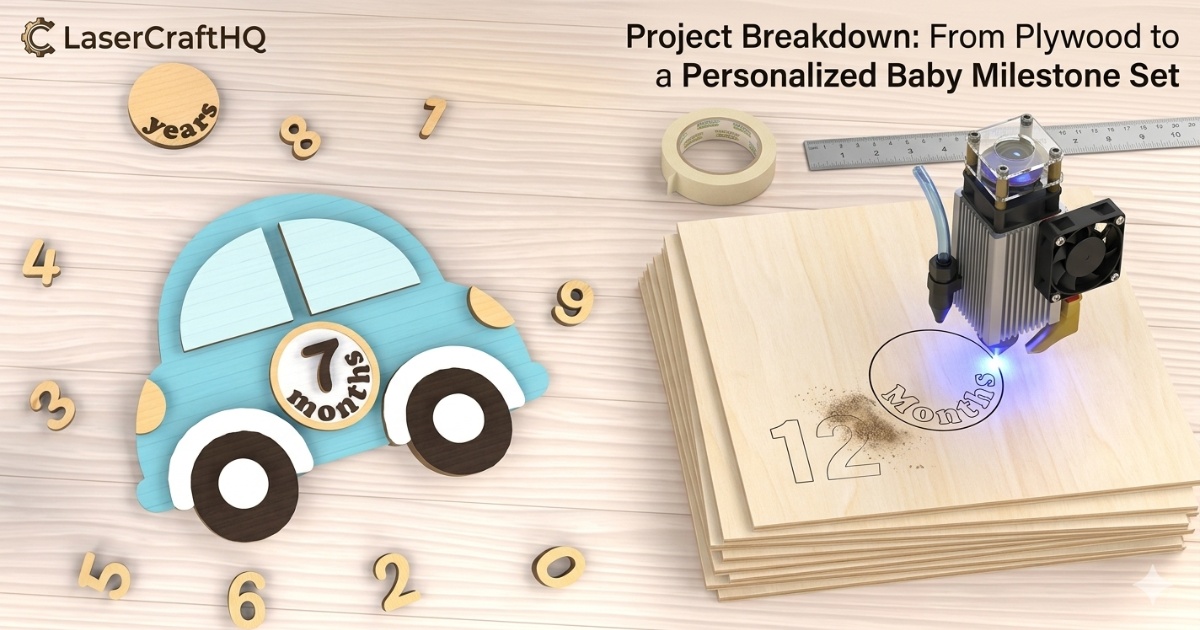
HQ Pick: The Baby Milestone Wood Set on LaserCraftHQ uses a tested laser cut SVG file designed from the ground up for wood laser cutting. The car design, the number tiles 0–9, and the monthly elements are all production-ready — meaning you can load, cut, and assemble without surprises. The inclusion of numbers 0–9 allows parents to track every stage of their journey, making these cards the perfect props for those viral monthly photo updates on social media.
When evaluating any laser cut SVG, look for these green flags:
- All paths are closed (no open nodes that cause incomplete cuts)
- Layers are clearly labeled — engrave, cut, score
- The file includes a kerf test or recommends a tolerance
- The designer has tested it on real wood, not just paper
Materials: What Works and What We Recommend
You have more than one option when it comes to material for a baby milestone set. The design file works with several wood-based sheet materials — each with its own trade-offs. Here's how the main options compare:
- 3mm MDF — cheap, cuts consistently, but heavier and not ideal around moisture. The edges absorb paint unevenly and the dust is not something you want near a baby environment long-term.
- 3mm Poplar Plywood — a step up from MDF. Clean cuts, decent grain, more available locally. Works well if Baltic Birch is hard to source in your region.
- 3mm Basswood — very fine grain, excellent for engraving detail, but softer and slightly more prone to warping in humid conditions.
- 3mm Baltic Birch Plywood — the material we recommend for this project. More on why below.
Our pick: Baltic Birch
Not all plywood is created equal. Standard construction plywood has voids inside the core — air pockets that cause the laser to burn unevenly or blow out entirely on fine details. Baltic Birch (also sold as "laser-grade birch plywood") is made from thin, void-free birch veneers glued with a formaldehyde-reduced adhesive. The result is a material that cuts cleanly, engraves crisply, and holds its shape without warping — and crucially, the off-cuts and dust are non-toxic, which matters for anything made in a baby-adjacent context.
Why 3mm (1/8 inch)?
- Structural integrity — thick enough to stay rigid when assembled into a 3D shape, thin enough for a diode laser to cut in 1–2 passes
- Detail resolution — the fine edges on numbers and decorative elements stay sharp at 3mm; thicker wood rounds the corners
- Weight — the finished piece is light enough for a baby photo prop without risk of tipping over
- Safety — Baltic Birch off-cuts and dust are non-toxic, which matters in a baby-adjacent project
Laser Settings: Diode vs. CO2
There's no single "right" setting for cutting 3mm plywood — it depends on your laser's wattage, the age of the tube or diode modules, and even the ambient temperature of your workshop. That said, the numbers below are solid starting points that work for most setups. Always run a test cut on a scrap piece before committing your good material.
Diode Lasers (xTool S1, Creality Falcon, etc.)
Diode lasers have come a long way. A modern 20W+ optical diode module will cut 3mm Baltic Birch cleanly in 1–2 passes with the right settings. The key variables are power, speed, and focus.
| Parameter | Setting | Notes |
|---|---|---|
| Power | 90–100% | Max power for cutting |
| Speed | 300–500 mm/min | Slower = cleaner cut edge |
| Passes | 2–3 | Depends on module wattage |
| Focus | Sharp (on surface) | Re-focus between passes if needed |
CO2 Lasers (Glowforge, OMTech, etc.)
Glowforge projects shine here — CO2 lasers cut through 3mm Baltic Birch in a single clean pass. If you're using a Glowforge, use the built-in Proofgrade Medium Maple Plywood setting as a baseline, then fine-tune if your wood is denser.
| Parameter | Setting | Notes |
|---|---|---|
| Power | Full (Glowforge) / 65–75% | Lower for 60W+ machines |
| Speed | 150–200 mm/s | Adjust based on tube wattage |
| Passes | 1 | CO2 should cut in a single pass |
Air Assist is non-negotiable. Whatever machine you're running, turn on air assist. It blows combustion gases away from the cut zone, reduces char on the wood surface, and — most importantly — dramatically reduces the fire risk. On a detailed piece like a milestone set where the laser spends a lot of time on small geometry, this is especially critical. Don't cut without it.
For engraving the number details or decorative texture on the car body, drop to 20–30% power at a faster speed (3000–4000 mm/min on diode, 400–500 mm/s on CO2). This gives you a clean surface engrave without burning through the thin layer.
Assembly: The CA Glue + Activator Method
Once your pieces are cut, you'll be assembling multiple layers to build the 3D depth of the car body, the number tiles, and the base. The traditional approach — wood glue, clamp, wait overnight — works, but it's painfully slow when you have dozens of pieces.
The maker community long ago discovered a better way: CA glue (cyanoacrylate) with an activator spray. Here's why it's the standard for laser-cut 3D wood projects:
- Instant bond — the activator cures the CA glue in 5–10 seconds, no clamping required
- Thin viscosity — it wicks into the joint by capillary action, filling the entire surface contact area for a stronger bond than you'd get with PVA wood glue applied manually
- No squeeze-out — CA glue doesn't expand, so you won't get glue blobs ruining your clean laser-cut edges
- Gap-filling option — medium or thick CA fills any minor kerf gaps for a seamless look
The workflow: apply a thin bead of CA to one surface, position the piece, spray activator, hold for 10 seconds. Done. You can assemble an entire milestone set in under 20 minutes using this method.
Shop Professional CA Glue + Activator on AmazonFinishing & Safety: Painting It Right
This is a baby prop. It will be handled by new parents. It might end up in a baby's hand. That means the finish you choose matters beyond just aesthetics.
Use Child-Safe, Non-Toxic Acrylic Paints
Standard craft acrylics are typically water-based and non-toxic once cured, but not all are certified safe for items that may contact children. Look for paints labeled AP (Approved Product) certified non-toxic by the ACMI — this is the standard marking on professional-grade craft acrylics that confirms no harmful materials are present at detectable levels.
For a milestone set, you'll typically want:
- A base coat in white or cream for the number tiles
- Accent colors for the car body and decorative elements (soft blues, pinks, or neutrals photograph beautifully)
- A matte sealer to protect the paint without adding shine that catches harsh light in photos
The Pre-Masking Hack
Before loading your wood into the laser, apply a layer of painter's tape or transfer tape (pre-masking) over the entire surface. The laser cuts straight through it, but the tape protects the surrounding wood from smoke staining and resin deposits. When you peel it off after cutting, the wood underneath is clean and ready to paint — no sanding required. This single habit will save you hours of cleanup on every project.
When used as newborn photography props, sand the edges lightly with 220-grit sandpaper before painting. The laser leaves a slightly charred edge — beautiful as-is for a rustic look, but if you're going for a clean painted finish, a quick sand removes the char and gives the paint better adhesion.
Not a DIY Person? You Can Still Get This Look
Not everyone has a laser cutter at home, and that's okay! If you want something similar without making it yourself, you can find a great finished version of this Baby Milestone Set on Amazon — a solid alternative if you're in a rush for a baby shower gift!
Shop Finished Baby Milestone Set on AmazonConclusion: More Than a Project — It's an Heirloom
Here's the thing about handmade baby milestone sets: they don't get thrown in a donation box after the first birthday party. They get put in a keepsake box. They get brought out again when the child is old enough to hold the same wooden "1" they sat next to in their one-month photo. They show up in the background of family photos for years.
That's what separates a laser-cut wood prop from anything you can buy off a shelf. The imperfect grain of the birch. The slight smoke darkening on the cut edges if you left them natural. The specific blue you mixed at 2am the night before the shoot. Those details make it irreplaceable.
If you're making this as a DIY baby shower gift, know that you're giving something that will genuinely be remembered. And if you're making it for your own baby — congratulations. You're already thinking like a maker-parent, which is the best kind.
Ready to start? View the full Baby Milestone Wood Set project card on LaserCraftHQ for the tested SVG design and exact material links — everything you need in one place.