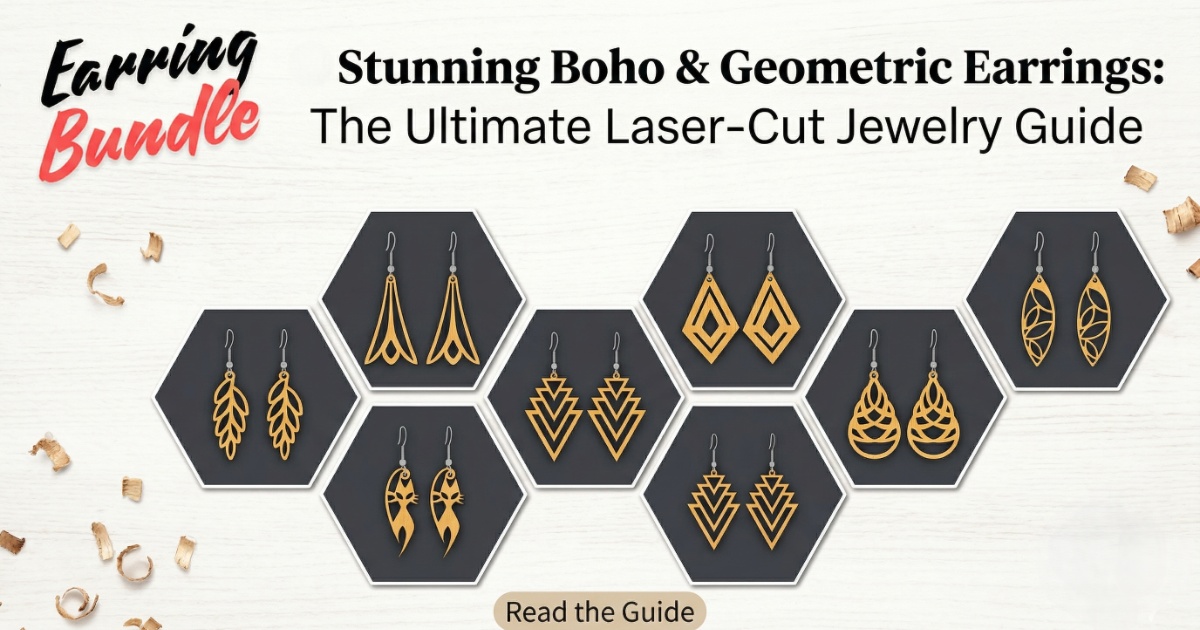
7 Stunning Boho & Geometric Earrings: The Ultimate Laser-Cut Jewelry Guide
If you've been looking for a laser project that's fast, cheap to produce, and genuinely exciting to give or sell — earrings are it. We're talking about a project where a single sheet of 3mm wood that costs less than $5 can yield 20+ pairs of earrings, each one taking under 15 minutes from raw material to finished piece. The profit margins on handmade laser cut earrings are among the best in the maker space. And if you've got a pile of offcuts and scrap wood sitting next to your laser right now, this collection was designed to use exactly that.
This guide walks you through the full process: choosing the right material, understanding what your laser can actually cut, finishing your pieces so they look boutique-worthy, and assembling them with the right hardware. By the end, you'll have everything you need to cut your first pair — or your first batch of 50.
Get the 7-Design SVG BundleWhy Earrings Are the Gold Mine of Laser Projects
Most laser projects have a size problem. A custom name sign requires a large piece of plywood. A decorative wall panel needs clean, full sheets. But earrings? Earrings are tiny. A single pair rarely exceeds 5x5cm. That means you can nest dozens of designs onto one sheet — or better yet, use up all those scrap pieces that are too small for anything else but too good to throw away.
Here's why earrings consistently top the list of best laser projects for makers who want to sell:
- Material cost is almost zero — scraps you'd otherwise bin become product inventory
- Cut time is fast — a full sheet of 20 pairs takes 15–30 minutes total
- Perceived value is high — a well-finished pair with a display card looks like a $20–$40 boutique item
- Gifting appeal is universal — earrings work as birthday gifts, Christmas gifts, wedding favours, and market stall bestsellers
The scrap pile solution: This 7-design collection was specifically chosen because the individual pieces are small enough to fit on offcuts. Before you start, check your scrap pile first. You might already have everything you need.
Material Deep-Dive: The Secret to Success
The material you choose changes everything — the look, the weight, the finish, and the cutting behaviour. Here's what you need to know about each option before you load your laser.
Wood — The Crowd-Pleaser
Think of wood thickness like clothing weight. 1.5mm basswood is your lightweight linen — airy, delicate, perfect for intricate filigree designs where every gram counts. 3mm Baltic Birch or Basswood is your denim — structured, solid, and holds up beautifully when the earring design has large open areas that need rigidity.
- 1.5mm Basswood — ideal for detailed, lace-like geometric designs. Cuts fast on any laser. Very lightweight on the ear. Slightly more fragile, so avoid designs with thin bridges.
- 3mm Baltic Birch or Basswood — the safe, versatile choice. Cuts cleanly, engraves beautifully, and takes paint and stain without issues. The standard for most earring projects.
Both materials work on every type of laser — diode, CO2, whatever you have. No compatibility issues. Just load, cut, and go.
Shop Wood Sheet Material on AmazonAcrylic — The Statement Maker
Acrylic gives earrings a completely different personality — glossy, bold, modern, and available in every colour you can imagine including holographic, marble-effect, and mirror finishes. But before you order a stack of acrylic sheets, you need to know the most important rule in laser cutting acrylic: your laser type determines what you can cut.
CO2 Laser (Glowforge, OMTech…)
Cuts all types of acrylic: transparent, frosted, white, coloured, mirror, and metallic. If you have a CO2, you can use any acrylic sheet you find.
Diode Laser (xTool, Sculpfun…)
Cuts only dark and opaque acrylics — black, dark red, dark blue. Cannot cut transparent or white acrylic. The laser beam passes straight through them like a window — nothing happens.
The Metal Look Hack
One of the most common questions from new makers is: "Can I cut these in metal?" The honest answer is no — common hobby lasers cannot cut through metal. That requires an industrial fiber laser costing tens of thousands of dollars.
But here's the secret the best makers already know: you don't need to cut metal to get a metallic result. There are two approaches that work beautifully:
- Gold Mirror Acrylic — a dark-backed acrylic sheet with a genuine mirror-gold finish on the front. Diode lasers can cut it (dark backing absorbs the beam), and the result looks like real gold-toned metal jewelry. Indistinguishable to most buyers.
- Metallic spray paint on wood — cut your design in wood, sand lightly, then apply a quality gold or silver metallic spray. Two thin coats give you a high-end metallic look without any acrylic at all.
When cutting mirror acrylic, cut with the mirror side face-down on your bed. This keeps smoke residue off the reflective surface and gives you cleaner edges. Peel the protective film after cutting — never before.
Step-by-Step Project Walkthrough
Step 1 — Cutting Clean Edges
The difference between a hobbyist result and a professional-looking earring often comes down to one simple habit: masking tape before you cut.
Apply a layer of painter's tape or transfer tape across the entire surface of your material before loading it into the laser. The laser cuts straight through the tape, but it catches all the smoke residue and resin deposits that would otherwise stain the surrounding wood. When you peel it off after cutting, the surface is clean. No smoke halos, no brown staining around the cut edges. This single step alone will significantly upgrade the quality of your output.
For acrylic, simply leave the factory protective film on. Same principle — peel after cutting.
Step 2 — Post-Processing: Sanding & Char Removal
Fresh off the laser, wood earrings have slightly charred edges — a natural result of the cutting process. For some designs and finishes, you'll want to leave this: the dark edges give a rustic, burnt-wood aesthetic that looks intentional and beautiful. For a painted finish, you'll want them gone.
- Use 220-grit sandpaper to lightly sand the flat faces and edges. This removes char and opens the grain for better paint adhesion.
- Wipe down with a dry cloth or compressed air to remove all dust before painting.
- For very fine detail areas (inside corners, small cutouts), a folded piece of sandpaper or a small nail file works well.
Step 3 — Painting & Finishing for a Boutique Look
This is where the earring goes from "laser project" to "something someone would buy." The finishing step is the most skipped step by beginners — and the most regretted.
- Acrylic paint markers are ideal for small earring designs — precise, fast-drying, and easy to control without obscuring fine detail.
- Spray paint works best for solid colour fills and metallic finishes. Hold the can 20–25cm away and use short, overlapping passes. One coat is never enough — two thin coats always beat one thick one.
- Seal everything. A coat of clear matte or gloss varnish protects the paint from chipping, scratches, and moisture. Skip this and your paint will start peeling within weeks. This is the step that makes handmade look professional.
For acrylic earrings, no painting or sealing is needed — acrylic is weatherproof by nature. The only step is polishing the edges with a soft cloth if needed.
Step 4 — Assembly: Jump Rings & Hooks
Assembly is quick once you know the right technique. You need two components: jump rings (the small metal loops that connect the earring piece to the hook) and earring hooks (the part that goes through the ear).
- Finish your earring piece first — paint and seal before attaching hardware. Much easier to handle without the hook getting in the way.
- Open the jump ring correctly — this is the technique most beginners get wrong. Use two pairs of flat-nose pliers. Hold the ring at the seam and twist one end toward you, one away from you. Never pull the ring open sideways — this permanently distorts the circular shape and you'll never get a clean close.
- Thread the jump ring through the hole at the top of the earring piece, then through the loop at the bottom of the earring hook.
- Close the jump ring by reversing the twist until the two ends meet flush with no gap. A gap means the jump ring can open under pressure and your earring will fall off.
No hole in your design? Add a small circle (2–3mm diameter) in your laser software before cutting, positioned 2–3mm from the top edge of the design. This becomes your jump ring hole. Make sure there's enough material around it so the earring doesn't crack when the jump ring is under tension.
Selling & Gifting: Make Them Look Like They Cost More
The earring itself is only half the product. Presentation is the other half — and this is where most makers leave money on the table.
Use Display Cards
A display card is a small piece of thick cardstock (usually 5x8cm) with a slot or two small holes punched through it. You thread the earring hooks through the holes and the earrings hang on the card. The result transforms a handmade pair of earrings into something that looks like it came from a boutique shop. You can print your brand name and logo on the card, add care instructions on the back, and include a small "made with love" message.
Display cards cost almost nothing to produce — a home printer and cardstock from any office supply store is enough. But the perceived value they add is enormous. Customers buying at a market or online will pay significantly more for earrings presented on a branded card than for the same earrings in a plain bag.
If you're selling, always use hypoallergenic surgical steel hooks and say so in your listing or on the display card. A significant portion of buyers have metal sensitivities and specifically search for this. It expands your customer base and justifies a higher price point.
Don't Have a Laser?
If you want something similar without making it yourself, you can find a great finished version of boho wooden earrings on Amazon — a solid alternative if you're looking for a quick gift or just want to see the finished look before committing to the DIY version.
Shop Finished Boho Earrings on AmazonNow Go Clear That Scrap Pile
You now have everything you need. The designs are tested, the material options are clear, the assembly technique is straightforward. What's left is the most important part: actually making something.
Dig out those scraps that have been sitting next to your laser for months. Pick the design that catches your eye first. Cut one pair. See how it feels to hold a finished earring you made in under 15 minutes from material you would have thrown away. Then cut twenty more.
Share what you make — whether it's on Pinterest, Instagram, or an Etsy listing. Every pair you put out into the world is also a signal to the algorithm that laser cut jewelry exists and people want it. You're not just making earrings. You're building something.
Ready to start? View the Boho Earring Collection project card on LaserCraftHQ for the full design link and recommended material in one place.